Add a New Provider (Server)
Introduction
This document provides a step-by-step guide to adding a provider to the server-side configuration. All the required information is collected directly from the server.
Procedure
To add a new Provider on Ingest Labs, perform the following steps:
Step 1: Click Add Provider and select Server from the options available at the top-right corner of the screen.

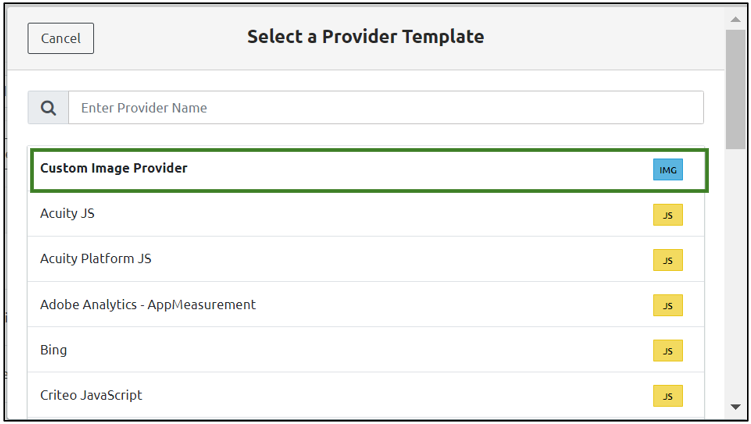
Step 2: The Provider Template panel appears on the right side of the screen. Select a template from the available list, or use the Search bar to quickly find a specific template.

Step 3: Let's take an example of the Facebook Conversion API provider template.

Note: In the list, each template includes a label such as IMG, JS, or APP, indicating whether the provider uses an image-based, JavaScript-based, or app-based implementation.
Step 4: The Provider Details section is automatically pre-filled based on the selected provider. However, you can make changes if needed by editing the available fields.

Step 5: In the Attributes section, you can view the attributes for Data Elements and Transformers.
Step 5.1: Click Choose Data Element to select the relevant data element for the attribute.

Step 5.1.1: The Select Data Element panel opens on the right side of the screen. At the top of this panel, you will see a Search bar.
You can do one of the following:
Use the Search bar to find a specific data element, or
Browse and select from the list displayed under the two tabs:
User-Defined
Default

Step Result: The selected Data Element is visible in the Value section.
Note: To cancel the selected Data Element, click the small x icon next to the selected item.

Step 5.1.2: Settings Configuration:
Under the Settings section, the following checkboxes are available:
Mandatory: Ensures the attribute must be set.
Fatal: Terminates the process if the value is missing or invalid.
Ignore If Empty: Skips the attribute during processing if no value is provided.
Hash (SHA256): Converts the value into a secure SHA256 hash.

Step 5.1.3: Click Settings to configure these options.

Step 5.1.4: The Attribute Settings window opens.

Note:
All previously selected attributes will appear ticked.
You can uncheck any previously selected items or check the boxes for new attributes as needed.

Step 5.1.5: Under the Transformers section:
URL Encode: Check this box if you want the value to be automatically encoded for safe URL transmission.

Step 5.1.6: Click the Data Type Conversion drop-down. The following options are available:
No Conversion: No change will be applied to the data.
Convert to Boolean: Changes the data to
trueorfalse.Convert to Number: Converts the input into a numeric value.
Convert to Array: Transforms the data into an array format.
Convert to Object Spread: Moves JSON attributes from a nested level to the root level.

Step 5.1.7: Redaction Options
In the Redaction section, two checkboxes are available:
Ignore Redaction: Skips applying redaction rules for this attribute.
Exclude from Request Body: Prevents this attribute from being included in the outgoing request payload.

Step 5.1.8: Once all the required fields are filled:
Click Confirm to save the configuration.
Note: To discard changes, click Cancel.

Step 5.2: Click Choose Transformer.

Step 5.2.1: The Select Transformer panel opens on the right side of the screen.
At the top of the panel, there is a Search Bar. You can either:
Use the search bar to quickly find a Transformer, or
Browse through the list displayed below and select a Transformer manually.

Step Result: The selected Transformer is visible in the Value section.

Note: To cancel the selected Transformer, click the small x icon next to the selected item.

Step 5.2.2: Settings Configuration:
Under the Settings section, the following checkboxes are available:
Mandatory: Ensures the attribute must be set.
Fatal: Terminates the process if the value is missing or invalid.
Ignore If Empty: Skips the attribute during processing if no value is provided.
Hash (SHA256): Converts the value into a secure SHA256 hash.

Step 5.2.3: Click Settings to configure these options.

Step 5.2.4: The Attribute Settings window opens.
All previously selected attributes will appear ticked.
You can uncheck any previously selected items or check the boxes for new attributes as needed.

Step 5.2.5: Click the Data Type Conversion drop-down menu.
Select the appropriate conversion type from the available options:

No Conversion
Indicates that there is no conversion required for the data type.
Convert to Boolean
Converts the input data to Boolean.
Convert to Number
Converts the input data to a number.
Convert to Array
Converts the input data to Array.
Convert to Object Spread
Converts the JSON attributes under a parent level attribute to the root level attributes.
Step 5.2.6: In the Redaction section, two checkboxes are available:
Ignore Redaction: Skips applying redaction rules for this attribute.
Exclude from Request Body: Prevents this attribute from being included in the outgoing request payload.

Step 5.2.7: Once all the required fields are filled:
Click Confirm to save the configuration.
Note: To discard changes, click Cancel.

Step 6: HTTP Headers (Optional)
Step 6.1: To add HTTP headers:
Click Add Header.
In the Name field, enter the header name.
In the Value field, enter the corresponding value.
Select the Mandatory checkbox if the header is required.
Note: To delete a header, click the Delete option next to it.


Step 7: Connectors:
In the Connectors section, you will see two fields: Name and Value.
The Name field is pre-filled.
You need to enter the corresponding Value based on your configuration.

Step 8: Final Step
Once all the required fields are completed, scroll up and click Save to apply the changes.

Last updated
