> For the complete documentation index, see [llms.txt](https://docs.ingestlabs.com/llms.txt). Markdown versions of documentation pages are available by appending `.md` to page URLs; this page is available as [Markdown](https://docs.ingestlabs.com/media-data-platform/pipelines/edit-pipeline-data-source-schema.md).
# Edit Pipeline Data Source Schema
After creating a pipeline, you can edit the **Data Source Schema** to define the format of the data to be extracted from the data source or the segment for exporting.
**To edit a Pipeline, perform the following steps:**
**Step 1**: From the left navigation panel, select **Pipelines**.
**Step 2**: Click the pipeline you want to edit.
**Step 3**: Click **Data Source Schema**.
**Step 4**: Under **Schema**, the following fields are available:
* Schema Fields
* Additional Fields
* Filters
**Step 5**: The **Schema Fields** tab is selected by default.
**Step 5.1**: Click the **Edit** button, which is located to the right of the **Schema Fields** section.
**Step 5.2**: Scroll down and click **Add New Field**.
**Note**: You can add any number of **Schema Fields** to the Data Source Schema.
**Step 5.3**: Perform the following actions:

**Step 5.4**: Key.
* If the pipeline type is **Segments**, select from the **Key** dropdown menu.
* If the pipeline type is **Data Source**, type a key.
**Step 5.5**: The **String** Data Type is the default data type for the **Segments** pipeline. Select one of the following data types for the **Data Source** pipleline:
* NUMBER - Numeric values
* STRING - Text
* BOOLEAN - True/False
* JSON - Structured data
* JSON STRING - JSON stored as a string
* Date - Calendar date
* TIMESTAMP - Date with time
**Step 5.6**: Select the **Default Value** from the following:
* Undefined - No value assigned
* Null - Explicitly empty value
* Custom Value - User-specified default value
**Step 5.7**: By default, the **Optional** checkbox is selected. Unselect it to make it a mandatory field.
**Step 5.8**: Array: When the data type is String, Boolean, JSON, or JSON String, ensure that the Array checkbox is checked.
**Step 5.9**: Click the **Settings** icon to add the following validations.
* Minimum and maximum length - Defines the allowed length range for the input.
* Pattern - Ensures the input matches a specific format using a regex pattern.
* Allowed Values - Restricts input to predefined values.
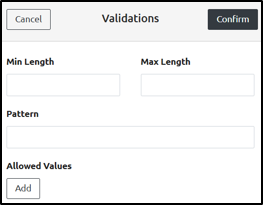
**Step 5.10**: Click **Confirm** to save the validations.
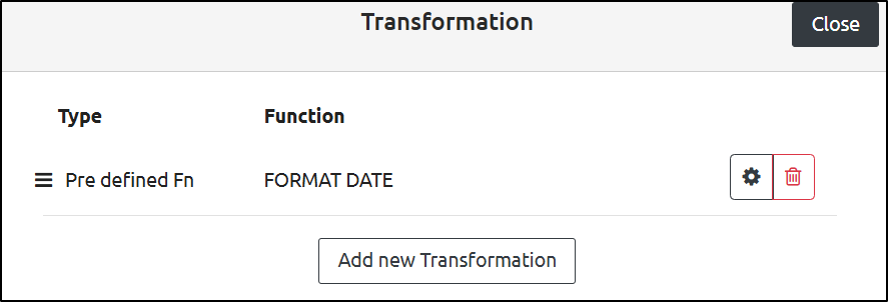
**Step 5.11**: Click the **Transformation** icon to add transformations to the **Data Source Schema**.
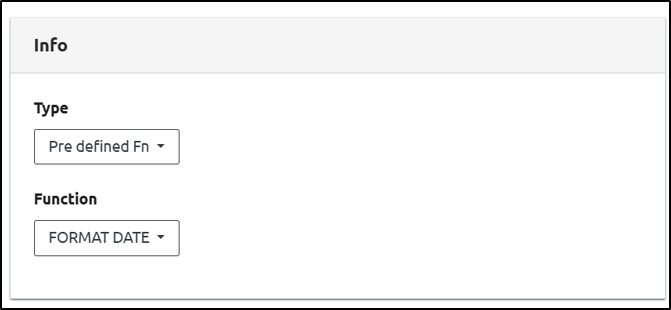
**Step 5.11.1**: Opens the **Transformation** panel on the right side and click **Settings**. Under the **Info,** two options will be available:
* Type
* Function
Select the appropriate one.
**Step 5.11.2**: Under **Type**, the following options are available:
* Pre-Defined - Uses standard validation rules.
* Custom - Allows user-defined validation criteria.
**Step 5.11.3**: The pre-defined functions are as follows:
* Format Data - Formats data into a specific structure.
* To Bool - Converts a value to a boolean (`true` or `false`)
* To Number - Converts a value to a numeric format.
* URL Encode - Encodes a URL to ensure safe transmission.
* Base64 Encode - Converts data into a Base64-encoded string.
* SHA265 Hash - Generates a secure SHA256 hash of the input.
* Base64 Decode - Decodes a Base64-encoded string back to its original form.
**Step 5.11.4**: In the case of **Custom Functions**, denote the code.
**Step 5.11.5**: Click Confirm.
**Step 5.11.6**: **Step Result** - Data source is created successfully.
**Note**: You can add any number of transformations in the Schema Fields. To update a transformation, click the settings icon next to it. To delete a transformation, click the delete icon next to the transformation function.
**Step 6**: Click **Additional Fields**.
**Step 6.1**: Enter the appropriate value in the **Key** field.
**Step 6.2**: Under **Data Type**, the following options are available. Select the appropriate one:
* NUMBER - Represents numeric values.
* STRING - Represents text or alphanumeric characters.
* BOOLEAN - Represents `true` or `false` values.
* DATE - Represents a calendar date without a time component.
**Step 6.3**: Under the **Value** field, the following options are available. Select the appropriate one:
* Source Field - Uses a value from an existing field.
* Function - Applies a predefined function to transform the value.
* JSON Path - Extracts data from a JSON structure using a path expression.
* URL Param - Retrieves a value from a URL parameter.
**Step 6.4**: By default, the **Optional** checkbox is selected. Unselect it to make it a mandatory field.
**Step 6.5**: Opens the **Transformation** panel on the right side and click **Settings**. Under the **Type** dropdown, two options will be available:
* Pre-defined - Uses built-in transformation functions for common data modifications.
* Custom - Allows users to define their own transformation logic based on specific requirements.
Select the appropriate one.
**Step 6.5.1**: The pre-defined functions are as follows:
* Format Data - Structures data into a specific format.
* To Bool - Converts a value to a boolean (`true` or `false`).
* To Number - Converts a value to a numeric format.
* URL Encode - Encodes a URL to ensure safe transmission.
* Base64 Encode - Converts data into a Base64-encoded string.
* SHA265 Hash - Generates a secure SHA256 hash of the input.
* Base64 Decode - Decodes a Base64-encoded string back to its original form.
**Step 6.5.2** In the case of **Custom Functions**, denote the code.
**Step 6.5.3**: Click Confirm.
**Step Result:** Data source is created successfully.
**Step 7**: Click **Filters**
**Step 7.1**: When you check the **Enable Filter** box, the **Function** tab opens.
**Step 7.2**: Under the Type dropdown, the following options are available:
* Pre-Defined Fn - Uses built-in filter functions to process data automatically.
* Custom Fn - Allows users to define their own filtering logic based on specific conditions
Select the appropriate one.
Follow these steps **4.9.2** and **4.9.3** for Pre-Defined Fn and Custom Fn to proceed further.
---
# Agent Instructions
This documentation is published with GitBook. GitBook is the documentation platform designed so that both humans and AI agents can read, navigate, and reason over technical content effectively. Learn more at gitbook.com.
## Querying This Documentation
If you need additional information that is not directly available in this page, you can query the documentation dynamically by asking a question.
Perform an HTTP GET request on the current page URL with the `ask` query parameter, and the optional `goal` query parameter:
```
GET https://docs.ingestlabs.com/media-data-platform/pipelines/edit-pipeline-data-source-schema.md?ask=&goal=
```
`ask` is the immediate question: it should be specific, self-contained, and written in natural language.
`goal` is optional and describes the broader end goal you are ultimately trying to accomplish on behalf of the user. GitBook uses it to tailor the answer towards what is most useful for that goal.
The response will contain a direct answer to the question and relevant excerpts and sources from the documentation.
Use this mechanism when the answer is not explicitly present in the current page, you need clarification or additional context, or you want to retrieve related documentation sections.