Funnel Monitoring Alarm Feature
Introduction
The Funnel Monitoring Alarm is a new alarm added to Tag Manager that provides real-time alerts for specific notifications within your funnels.
Follow these steps to set up and configure the alarm:
Navigate to Tag Manager > Alarms.

Step 1: Click the Add Alarm dropdown and select Add Funnel Monitoring Alarm.


Step 2: Under the Info section, the Name and Description fields are available. In the Name field, enter a descriptive name for your Funnel Monitoring Alarm, and in the Description field, provide additional details to clarify the purpose or scope of the alarm.

Step 3: Under Funnel Monitoring Type, in the Select Funnel Monitoring Type dropdown, two options are available:
· Conversion and
· Occurrence

Step 3.1: Click Conversion.
Conversion: This option tracks the percentage of users who progress from adding products to their cart to completing a purchase. For example, if a user visits the website, adds products to the cart but does not complete the purchase, the website owner can use this alarm to monitor the conversion rate. The alarm provides a clear percentage, helping the owner understand how many users are converting from Add to Cart to Purchase.
Step 3.1.1: In the Event Name section, provide a clear and descriptive name for the event you want to monitor. Click Add Event.

Step 3.1.2: Under the Check Type dropdown, the following options are available:
· LESS_THAN
· GREATER_THAN
· LESS_THAN_EQUAL_TO, and
· GREATER_THAN_EQUAL_TO.
For example, if you specify 60% in the Value section and select LESS_THAN from the dropdown, a notification will be sent if the monitored percentage falls below 60%. Similarly:
· GREATER_THAN will send a notification if the percentage exceeds 60%.
· LESS_THAN_EQUAL_TO will trigger a notification if the percentage is 60% or lower.
· GREATER_THAN_EQUAL_TO will send a notification if the percentage is 60% or higher.

Step 3.2: Click Occurrence.
Step 3.2.1: In the Event Name section, provide a clear and descriptive name for the event you want to monitor.

Step 3.2.2: Under the Select Threshold Type dropdown, the following options are available:
LESS_THAN
GREATER_THAN
LESS_THAN_EQUAL_TO
GREATER_THAN_EQUAL_TO
In the Value section, specify the numeric threshold you want to monitor. For example, if you select LESS_THAN and enter a value of 50, the alarm will trigger when the monitored percentage falls below 50%. Similarly:
· Selecting GREATER_THAN will trigger the alarm when the value exceeds the specified threshold.
· LESS_THAN_EQUAL_TO will activate the alarm when the value is equal to or less than the threshold.
· GREATER_THAN_EQUAL_TO will trigger the alarm when the value is equal to or greater than the threshold.

Step 4: Time Window.
Choose how sensitive you want your alarm to be by configuring the time window settings.
Under the Unit dropdown, the following options are available:
HOUR
DAY
WEEK
MONTH
In the Value field, specify a numeric value that corresponds to your selected unit. For example:
· If you enter 2 in the Value field and select HOUR from the dropdown, the alarm will monitor events within a 2-hour time window.
· Similarly, choosing DAY with a value of 1 will set the alarm to monitor events within a 1-day period.

Step 5: Destinations.
Under the Notification Groups dropdown, you can select the groups that should receive the notification. By choosing a specific group, all members of that group will be alerted when the alarm is triggered.
Under Email IDs, if you want to send the notification to a specific email address in addition to the selected groups, you can enter the email address here. This allows you to add a new user or ensure that a particular individual receives the notification directly.

Delete an Alarm
You can delete a particular alarm.
To delete an alarm in Ingest Labs, perform the following steps:
Select the alarm that you want to delete.
From the Actions drop-down menu on the top right corner, select Delete.
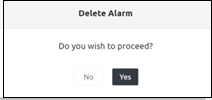
Click Yes on the confirmatory message that appears.
Step Result: The alarm is deleted successfully.