Loading...
Loading...
Loading...
Loading...
Loading...
Loading...
Loading...
Loading...
You can delete a particular Transformer.
To delete a Transformer in Tag Manager, perform the following steps:
Step 1: Select the Transformer that you want to delete.
Step 2: In the top right corner, click the Actions drop-down and select Delete.
Step 3: Click Yes on the confirmatory message that appears.
Step Result: The Transformer is deleted successfully.
Note: The following error occurs if there are any dependencies for the transformers in tags.

You can edit the details of an existing transformer using this option.
To edit the Transformer, perform the following steps:
Step 1: Select the Transformer that you want to edit.
Step 2: From the Actions drop-down menu on the top right corner, select Edit.
Step 3: You can edit the details in the Info, Function Arguments, and Code sections.
Step 4: Click Save on the top right to save the changes.


This document explains step by step how to add Transformers to the browser side. All the information required for client-side or browser-side configuration is provided.
To add a new Transformer in Tag Manager, perform the following steps:
Step 1: From the left navigation panel, select Transformers.
Step 2: Click the Add Transformer drop-down and select For Browser.
Step 3: Under the Info section, enter the function name in the Function Name field.
Step 4: Enter the Description in the Description field.
Step 5: In the Function Arguments section, click Add Agreement.
Step 5.1: In the Name field, enter the appropriate name.
Step 5.2: Under Value, click Select Data Element.
Step 5.3: The Select Data Element panel opens on the right side. Two tabs are available — User-defined and Default. You can select a data element from these tabs or use the search bar to find one.
Note: Click the selected argument data element value. The data element details will appear in the right panel.
Note: To clear the selected data element value, click the small X icon next to it.
Step 5.4: Select the checkboxes for Mandatory and URL Encode, if required.
Note: To delete the Argument, click the Delete icon on the right-hand corner of the screen.
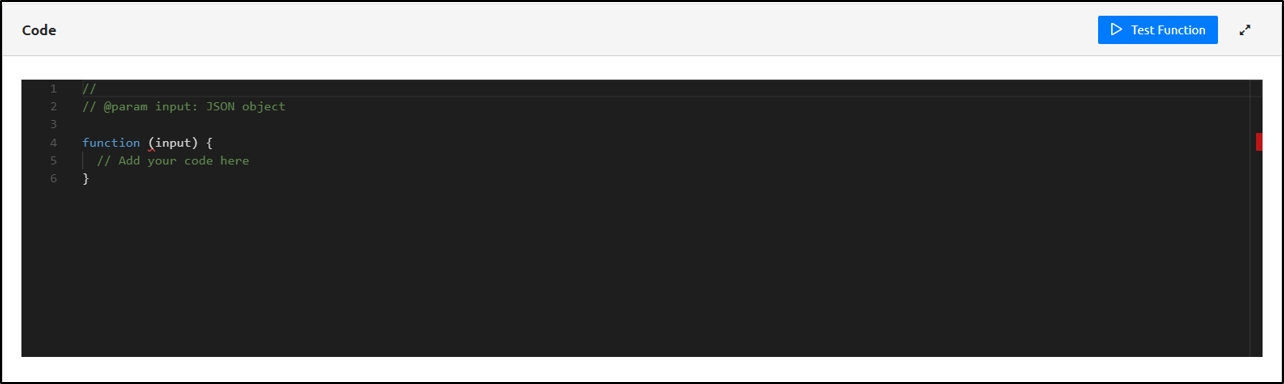
Step 6: To access the Argument, enter the code in the Code section. You can also Test the function using the Test Function tab on the right-hand corner of the screen.
Step 7: Click the Full Screen icon to expand the code and view it in full screen mode.
Step 8: Click Test Function. The Test Function panel opens.
Step 9: Click the Select dropdown and choose an input type:
Number — Use this option if your function requires a numeric input.
String — Use this option if your function requires text input.
Boolean — Use this option if your function requires a true/false value.
JSON — Use this option if your function requires structured data in JSON format.
Step 10: Enter the Argument value that corresponds to the selected input type.
Step 11: Navigate to the Output tab to view the result of the executed function.
Step 12: Click Save to save the Transformers details.
The Transformers or the transformation functions are the main building blocks of data while implementing tags. The data layer value may return an object and needs to convert it into a variety of other formats to be used within tags or provider attributes.
The standard approach is to create multiple Data elements and format the value each time while creating other Tag Managers. This results in the same data being redefined in various occurrences. However, if the source data changes, then you must update all the instances where it is being read and transformed to different formats.
A transformation function can accept any number of data elements as inputs, format the data, and return it in a different format as required for a dynamic template parameter.
The Transformers section includes the following topics:
This option indicates the number of Transformers currently displayed out of the total available Transformers.
This option indicates the number of Transformers currently displayed out of the total available Transformers. You can adjust the number of Transformers displayed per page using the dropdown menu located at the top-right corner of the screen.
50 per page: Displays up to 50 Transformers on the current page.
100 per page: Displays up to 100 Transformers on the current page.
200 per page: Displays up to 200 Transformers on the current page.
Click the Transformers dropdown. You will see two options: For Server and For Browser. Select the required option.
The Filter Transformers option is based on the following types:
Filter By Name: Filters the Transformers based on the trigger name.
Filter By Attribute Value: Filters the Transformers based on Attribute Value.
Filter By Metadata Attribute: Filters the Transformers based on Metadata Attribute.
Click the Refresh.
A Fetching Data Elements… message appears while the system retrieves and displays the updated data.
Name
Denotes the Transformer Name.
Type
Denotes whether the Transformer is a server-side or a browser-side setting.
Status
Denotes the status of the Transformer. • Production: The Transformer is under production. • Staging: The Transformer is in Staging. • Pending Publish: The Transformer is yet to be published.
Created By
Denotes the user who created the Transformer.
Updated By
Denotes the user who updated the Transformer.
Updated On
Denotes when the Transformer is last updated.
When a new Transformer is created and published for the first time, it is assigned Version 1. Every time the Transformer is edited and then published again, the version number is incremented: Example: Version 2, Version 3, and so on.
Note 1: For default Transformers, the version is always set to “1” because these are populated from the template. Note 2: Until the Transformer is published, the status displays Pending Publish. Once the Transformer is published in the staging or production environment, the status updates accordingly on the Transformer screen.


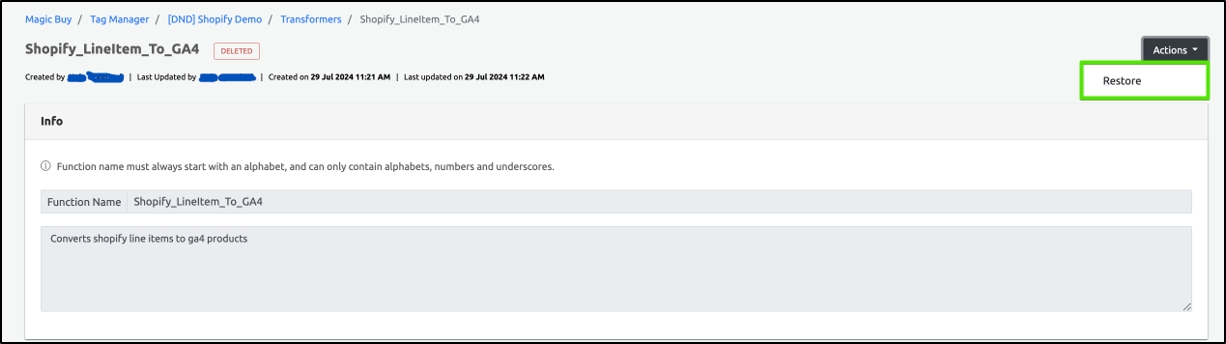
Step 1: Navigate to the Transformers screen to view the deleted transformer.
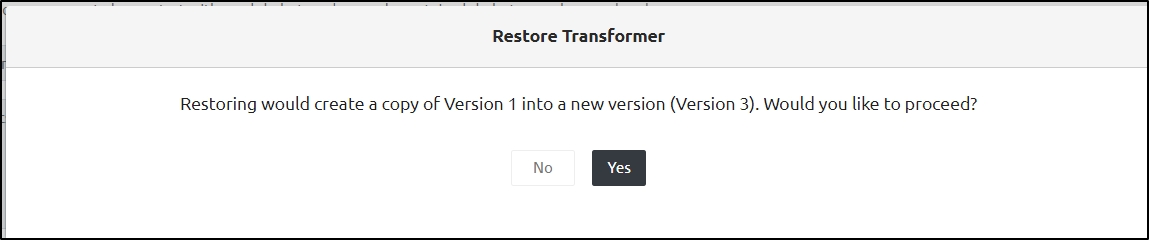
Step 2: Select the Transformer and click Restore in the Actions drop-down on the top right corner.
Step 3: Click Yes in the Restore confirmatory dialog box that appears.
Step Result: The Transformer is restored successfully.


This document explains step by step how to add Transformers to the server side. All the information required for client-side or server-side configuration is provided.
To add a new Transformer in Tag Manager, perform the following steps:
Step 1: In the navigation panel, click Transformers.
Step 2: Click the Add Transformer drop-down and select For Server.
Step 3: Under the Info section, in the Function Name field, enter the appropriate name.
Note: The Function name must always start with an alphabet, and can only contain letters, numbers and underscores.
Step 4: In the Description field, enter an appropriate description.
Step 5: Under the Function Arguments field, click Add Arguments.
Step 5.1: In the Name field, enter the appropriate name.
Step 5.2: Under the Value field, click Select Data Element.
The Select Data Element panel opens on the right side.
Two tabs are available:
User-defined
Default
You can select a data element from these tabs or use the search bar.
Note: Click the selected argument data element value. The data element details will appear in the right panel.
Note: To clear the selected data element value, click the small X icon next to it.
Step 5.3: The following checkboxes are available:
Mandatory: Select this checkbox to make the argument required.
URL Encode: Select this checkbox to encode the value for safe URL transmission.
Hash (SHA256): Select this checkbox to hash the value using the SHA256 algorithm.
Note: To delete the Argument, click the Delete icon on the right-hand corner of the screen.
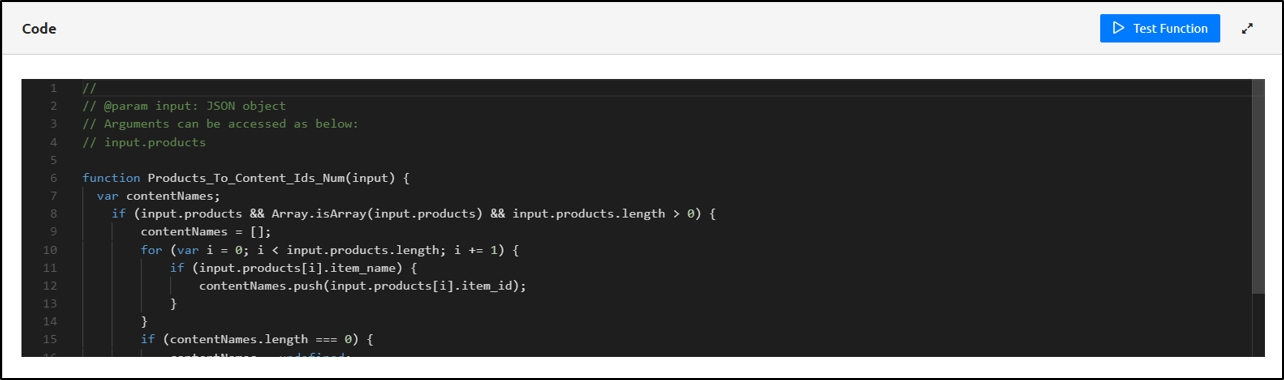
Step 6: To access the Argument, enter the code in the Code section. You can also test the function using the Test Function tab on the right-hand corner of the screen.
Step 7: Click the Full Screen icon to expand the code and view it in full screen mode.
Step 8: Click Test Function. The Test Function panel opens.
Step 9: Click the Select dropdown and choose an input type:
Number — Use this option if your function requires a numeric input.
String — Use this option if your function requires text input.
Boolean — Use this option if your function requires a true/false value.
JSON — Use this option if your function requires structured data in JSON format.
Step 10: Enter the Argument value that corresponds to the selected input type.
Step 11: Navigate to the Output tab to view the result of the executed function.
Step 12: Click Save to save the Transformer details.