Alarms
Alarms are the notifications triggered by specific events or conditions within the Tag Manager of Ingest Labs. Alarm notifications can be set to alert users when a tag expires, or is about to expire, or when there is a sudden anomaly in the tag behavior.
The two types of Alarms are Tag Anomaly Detection Alarm and the Tag Expiration Alarm.
Tag Anomaly Detection Alarm
The tags are typically triggered consistently over time. This regular pattern is monitored using the Bollinger band. However, there could be an anomaly or an abnormal tag behavior with a sudden spike or drop in the tag trigger. You can configure alarms to detect such anomalies in the tag behavior and receive timely notifications.
Tag Expiration Alarm
When configuring a tag within the Tag Manager, you can specify start and end dates for execution. Alarms can be set to notify configured contacts on tag expiry or just before tags expire. By default, if you do not select any criteria or filters while creating a new alarm, the alarm will be triggered for all configured tags within the project.
Additionally, using the Tag Expiry Look Back feature, you can set alarms in advance, specifying the number of days before tag expiration for reminder notifications and the exact time for alarm triggering.
Related Topics
The Alarms section includes the following topics:
Alarms Screen
The following UI elements appear on the Alarms screen.

Name
Denotes the Alarm Name.
Status
Denotes the Alarm status .
Created By
Denotes the user who created the alarm.
Updated By
Denotes the user who updated the alarm.
Updated On
Denotes the time and the date of the last update of the alarm.
Configuration of Alarms
You can configure one or both of these alarms:
Tag Anomaly Detection Alarm: To notify contacts when tag anomalies occur.
Tag Expiration Alarm: To notify contacts when a tag expires.
In Ingest Labs, you can create an alarm for tag expiration and anomaly detection. The configured contacts will receive an alert when an abnormal tag trigger is detected or when a tag expires. You can also set an advance notification for tag expiry using the Tag Expiry Look Back feature.
Add a New Alarm (Tag Anomaly Detection Alarm)
To add a new Tag Anomaly Detection Alarm, perform the following steps:
Step 1: Select Alarms from the left navigation panel.

Step 2: Click Add Alarm on the top-right corner of the screen.

Step 3: Select the Tag Anomaly Detection Alarm.

Step 4: Enter the following details in the New Anomaly Detection screen.

Name
The Alarm Name.
Description
Enter the description of the Alarm. The description must be more than five characters.
Environment
Select the Staging or the Production environment.
Step 5: Enter the details mentioned in the Settings section.
Threshold Sensitivity:
High sensitivity: The anomaly detection trigger will fire and send alert if it detects an anomaly at least ONCE in the previous hour.
Medium sensitivity: The anomaly detection trigger will fire and send alert if it detects an anomaly once in the past 2 consecutive hours.
Low sensitivity: The anomaly detection trigger will fire and send alert if it detects an anomaly once in the past 3 consecutive hours.
The Tag behavior is determined using the Bollinger Band.
Preferred Timings:
Select the exact tag monitoring period from the Preferred Timings drop-down. This is an optional setting. For example, If there is a sudden spike in traffic in the evenings, you could set the preferred timing from 5 p.m. to 10 p.m. The tag firing activities will be monitored every evening between 5 p.m. to 10 p.m.
Note: The tags are monitored continuously with a set preferred timing.
Step 6: Enter the details in the Filter Conditions section.
You can make the alarm more specific by creating monitors on specific tags, providers, or other attributes. To filter the alarms, perform the following steps:
On the alarm page, click Add Filter.
Tag
Specifies the tag to be monitored for anomaly detection.
Page Name
Specifies the Page Name to be monitored for anomaly detection. Select either contains or is from the Operator drop-down menu.
Provider
Specifies the Provider that needs to be monitored for anomaly detection.
Device Type
Select this option to display devices such as Desktop, Web, Mobile Web, Tablet, and Other.
OS
Select this option to display information regarding the OS such as iOS and Android.
Language
Select this option to set the preferred language.
Domain
Select the appropriate domain name. Select either contains or is from the Operator drop-down menu.
Status
Select this option to set to one of the Tag trigger Statuses. • Success (200) • Success (202) • Provider Side Failure (400) • Provider Side Failure (404) • Provider Side Failure (500) • Tag Validation Failure (900) • Tag Validation Failure (1000) • Error (1001) • Privacy Blocked (1002) • Skipped (1003) • Success with Warnings (1004) • Scheduled for retry (1005) • Maximum retry attempts reached (1006) • Delayed (1007)
Select the Operator options and select any operator to populate the list of available fields.
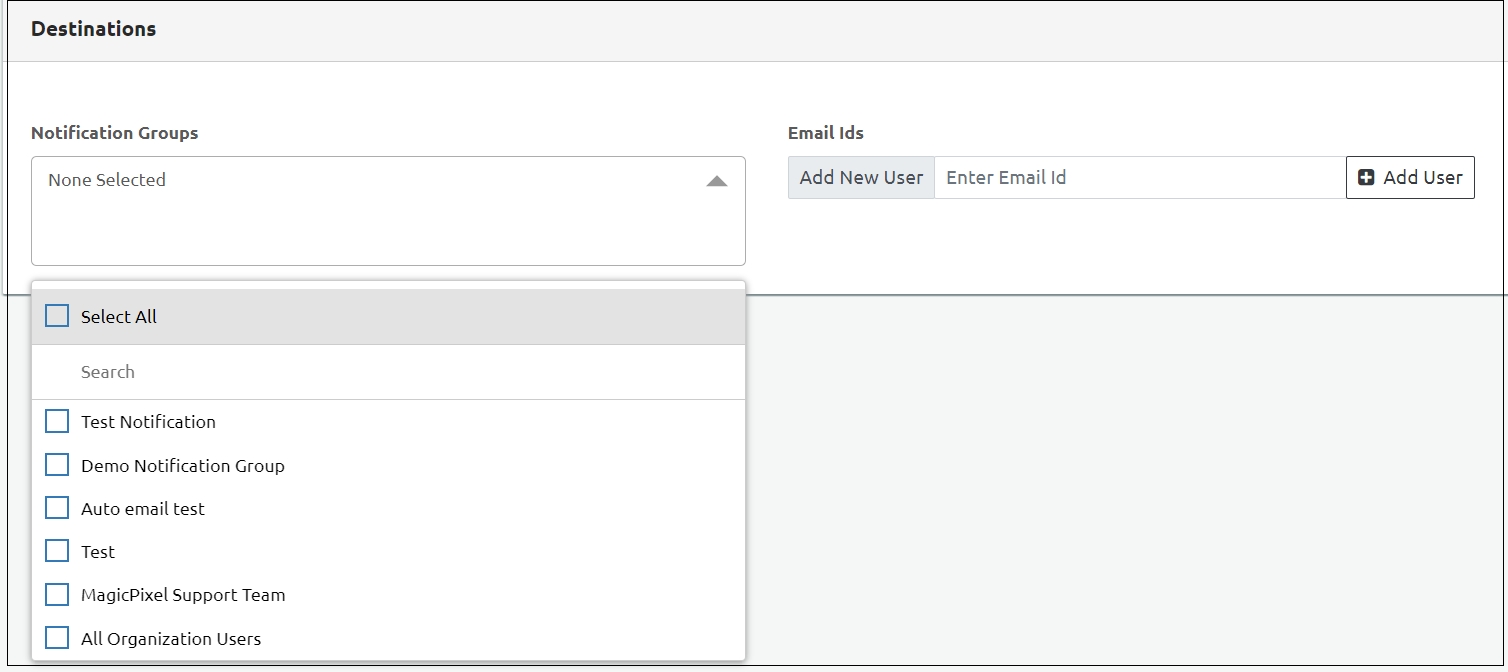
Step 7: Select Destinations section.
Select Notification Group: The tag anomaly alert will be sent to the contacts configured in the selected notification group. In this step, you can select the check boxes or search for a particular group.
Provide Email ID: Enter the email IDs of the users to send the notification for tag anomaly. You can add users using the Add Users tab.
Step 8: Click Save to save the settings.
Add Funnel Monitoring Alarm
Add a New Alarm (Tag Expiration Alarm)
To add a new alarm, perform the following steps:
Step 1: Select Alarms from the left navigation panel.

Step 2: Click Add Alarm on the top-right corner of the screen.

Step 3: Select Tag Expiration Alarm.

Step Result: The New Tag Expiration Alarm screen appears.

Step 4: Enter the following details in the New Tag Expiration Alarm screen.

Name
The Alarm Name.
Description
Enter the description of the Alarm. The description must be more than five characters.
Metadata filters
Select filters to make the alarms more specific and monitor specific tag groups.
Step 5: Enter the details mentioned in the Settings section.
a. Tag Expiry Lookback (in Days): Send tag expiration notification before the tag expires. You can choose five durations during which the alert should be sent. The number of days must be between 1-180.
b. Report Time: Select the time to trigger the tag expiration alarm. The timezone is set according to the user timezone.
Step 6: Select Destination.
Step 7: Select Notification Group: The tag expiration alert is sent to the contacts configured in the selected notification group. In this step, you can select the check boxes or search for a particular group.
Step 8: Provide Email ID: Enter the e-mail IDs to send the tag anomaly notification. You can add users using the Add Users tab.
Step 9: Click Save to save the settings.
Funnel Monitoring Alarm Feature
Introduction
The Funnel Monitoring Alarm is a new alarm added to Tag Manager that provides real-time alerts for specific notifications within your funnels.
Follow these steps to set up and configure the alarm:
Navigate to Tag Manager > Alarms.

Step 1: Click the Add Alarm dropdown and select Add Funnel Monitoring Alarm.


Step 2: Under the Info section, the Name and Description fields are available. In the Name field, enter a descriptive name for your Funnel Monitoring Alarm, and in the Description field, provide additional details to clarify the purpose or scope of the alarm.

Step 3: Under Funnel Monitoring Type, in the Select Funnel Monitoring Type dropdown, two options are available:
· Conversion and
· Occurrence

Step 3.1: Click Conversion.
Conversion: This option tracks the percentage of users who progress from adding products to their cart to completing a purchase. For example, if a user visits the website, adds products to the cart but does not complete the purchase, the website owner can use this alarm to monitor the conversion rate. The alarm provides a clear percentage, helping the owner understand how many users are converting from Add to Cart to Purchase.
Step 3.1.1: In the Event Name section, provide a clear and descriptive name for the event you want to monitor. Click Add Event.

Step 3.1.2: Under the Check Type dropdown, the following options are available:
· LESS_THAN
· GREATER_THAN
· LESS_THAN_EQUAL_TO, and
· GREATER_THAN_EQUAL_TO.
For example, if you specify 60% in the Value section and select LESS_THAN from the dropdown, a notification will be sent if the monitored percentage falls below 60%. Similarly:
· GREATER_THAN will send a notification if the percentage exceeds 60%.
· LESS_THAN_EQUAL_TO will trigger a notification if the percentage is 60% or lower.
· GREATER_THAN_EQUAL_TO will send a notification if the percentage is 60% or higher.

Step 3.2: Click Occurrence.
Step 3.2.1: In the Event Name section, provide a clear and descriptive name for the event you want to monitor.

Step 3.2.2: Under the Select Threshold Type dropdown, the following options are available:
LESS_THAN
GREATER_THAN
LESS_THAN_EQUAL_TO
GREATER_THAN_EQUAL_TO
In the Value section, specify the numeric threshold you want to monitor. For example, if you select LESS_THAN and enter a value of 50, the alarm will trigger when the monitored percentage falls below 50%. Similarly:
· Selecting GREATER_THAN will trigger the alarm when the value exceeds the specified threshold.
· LESS_THAN_EQUAL_TO will activate the alarm when the value is equal to or less than the threshold.
· GREATER_THAN_EQUAL_TO will trigger the alarm when the value is equal to or greater than the threshold.

Step 4: Time Window.
Choose how sensitive you want your alarm to be by configuring the time window settings.
Under the Unit dropdown, the following options are available:
HOUR
DAY
WEEK
MONTH
In the Value field, specify a numeric value that corresponds to your selected unit. For example:
· If you enter 2 in the Value field and select HOUR from the dropdown, the alarm will monitor events within a 2-hour time window.
· Similarly, choosing DAY with a value of 1 will set the alarm to monitor events within a 1-day period.

Step 5: Destinations.
Under the Notification Groups dropdown, you can select the groups that should receive the notification. By choosing a specific group, all members of that group will be alerted when the alarm is triggered.
Under Email IDs, if you want to send the notification to a specific email address in addition to the selected groups, you can enter the email address here. This allows you to add a new user or ensure that a particular individual receives the notification directly.

Delete an Alarm
You can delete a particular alarm.
To delete an alarm in Ingest Labs, perform the following steps:
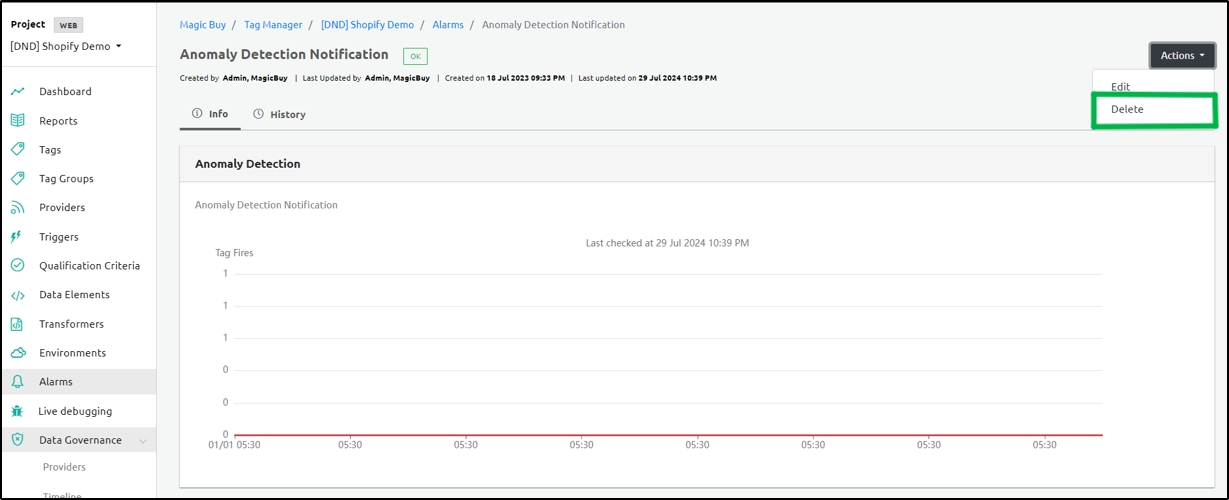
Select the alarm that you want to delete.
From the Actions drop-down menu on the top right corner, select Delete.
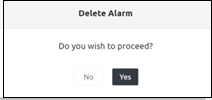
Click Yes on the confirmatory message that appears.
Step Result: The alarm is deleted successfully.
Edit an Alarm
You can edit the details of a particular alarm.
To edit an alarm in Ingest Labs, perform the following steps:
Step 1: Select the alarm that you want to edit.

Step 2: From the Actions drop-down menu on the top-right corner, select Edit.

Step 3: Edit the alarm details and click Save on the top right to save the changes.

Delete an Alarm
You can delete a particular alarm.
To delete an alarm in Ingest Labs, perform the following steps:
Step 1: Select the alarm that you want to delete.

Step 2: From the Actions drop-down menu on the top right corner, select Delete.

Step 3: Click Yes on the confirmatory message that appears.
Step Result: The alarm is deleted successfully.